My home office was in terrible need of repairs and upgrading. The rear windows had been leaking for quite some time. After several band-aid fixes – while the kids were still living at home – we decided it was time to strip the rear wall down to its structural components and start anew. Midlife has afforded us the opportunity to finally do these things [smile]. Upon completion of the new wall, we had no choice but to upgrade the office [big smile]; I’ve been having a splendid time with crafty makeovers and DIY office projects.
 One of my favorite projects to date is this 20 year old metal filing cabinet makeover. It’s a putty colored “security cabinet,” meaning the handles and locks are not removable. The inside of the drawer faces are sealed with metal plates. The cabinet wasn’t in bad shape so much as it was ugly! Realizing the handles couldn’t be removed, I elected to use a navy blue metal paint for the makeover.
The original plan was to paint the drawers, face, and top navy blue. Then Mod Podge a gingham navy blue trim to match my bulletin board. After priming with Zinsser and three coats of paint, I hated the finish. The blue varied in shades and sheen. I’ve painted items that are more difficult than this old filing cabinet and they came out beautiful; I don’t understand what caused the problem nevertheless I simply could not live with it!
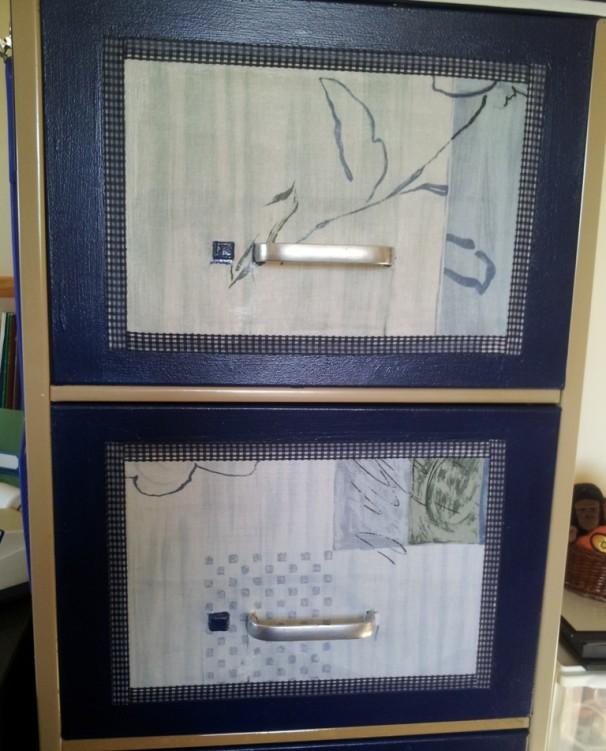
Mod Podge and fabric left over from an office chair makeover, facilitated a filing cabinet that I find adorable. I chose the matte finish Mod Podge rather than the glossy finish for the face. The matte finish did substantially even out the color of the blue paint . Sanding the Mod Podge finish was an option yet the brush strokes add a homespun depth and harmonize with the country ambiance. It’s certainly not perfect; nevertheless, it looks lovely in our home office!
Step One – A Simple Paint Job FAIL
1- Clean the exterior of filing cabinet with a good degreaser. Allow to dry completely. Wipe down with a clean damp cloth to remove any degreaser or residue that might be left behind.
2- Using a high density foam roller, apply one coat of Zinsser water based primer to the areas receiving paint. In my case, it was the drawer fronts and top. Allow primer to dry completely, according to directions.
**The high density foam rollers provide for a smooth painting surface. This was the only good thing about the paint job!
3- Cover the handles with painters tape. Use a good brand of tape to insure there won’t be any seeping onto the handles. I chose to paint the lock buttons, as they were in bad shape and a total eye sore.
4- When primer is dry, apply paint, one coat a time, allowing for drying time between coats. Follow directions for coat allowances.
5- Hate the paint finish and decide on an alternative. [sad face]
Step Two – Mod Podge the Drawers
1- Dig out the fabric scraps from the chair makeover. Measure the drawer width and length to determine the amount of fabric needed.
2- Cut the rectangles of fabric and lengths of ribbon to frame the edges.
3- Make a horizontal line across the top of drawer with a sharpie where the fabric square will begin.
4- Apply a thin but full coat of Mod Podge from the line on the drawer to just above the handle. Apply the fabric starting at the line you drew earlier. Press and rub to attach the fabric, smoothing out any bubbles along the way.
5- Make a vertical cut in the fabric from the bottom to the top of the handle. These cuts are at the outside of the handle on both sides creating a flap. Push the flap through the handle. Make a cut around the button and cut out a little extra on side where the button will slide. This will help to insure movement without damage to the fabric.
6- Make a horizontal cut under the handle but on the inside. You end up with a little square flap the height of the handle that will be cut away.
7- Now that you have the fit around the handles and the security button, apply Mod Podge to the rest of the drawer face. Again smoothing and pressing with your fingers. Pull up on the security button when smoothing the fabric in that area. Once the fabric is in place and all smooth, apply a thin coat of Mod Podge to the top of the fabric passing beyond the edges onto the drawer.
8- Now apply a coat of Mod Podge to back of the ribbon border and apply, one at a time. Apply by pressing and smoothing the same as the fabric.
***Measure the distance to the drawer edge or use a level to ensure ribbon is straight and even before the Mod Podge sets up. (I screwed up one side and didn’t notice till it was too late.)
9- Once the ribbon is in place and somewhat dry, carefully apply a heavy coat of Mod Podge to the entire drawer front.
10- I fit the bottom frame with the same drawer fabric to complete the front face style.
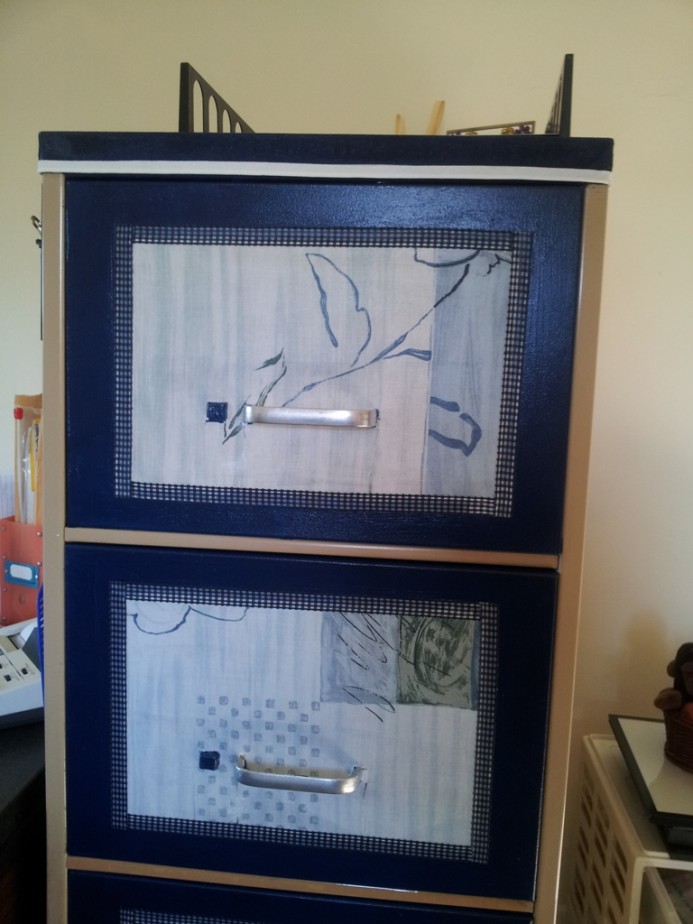
Step 3 – Mod Podge the Cabinet Top
I never bothered to paint the top as originally planned given how disappointed I was with painted drawer fronts. The top was really easy and quick to cover. I waited until the next day to applying fabric to the top. I had to be certain to allow the face to dry completely. I was very afraid to screw up those lovely drawer fronts!
1- The sides of the cabinet have a raised edge so I simply cut the jersey fabric to extend over the side of the cabinet to that edge.
2- Apply a thick coat of Mod Podge to the top but not the side edges as some may ooze out when smoothing the top. Set the fabric on top centered and begin smoothing with your hands, from the front to back. Next, I ran wallpaper-smoothing tool over the top to be sure no bubbles existed. Once in place and all smooth, apply Mod Podge to side edges one at a time. Press the fabric over the edge and smooth as you go along.
3- Lastly, white piping that I had in on hand was applied edge of the blue fabric. After about an hour, cover the entire top and sides with an even moderate coat of Mod Podge. Again, I used the wallpaper tool to smooth the top coat. Allow Mod Podge to cure for a day or so and recoat. *** I have read that up to five top coats may be applied however; only three coats were applied for this project.
WOW what a journey! What began as a simple paint job turned into a two day Mod Podge event. Yes, it was totally worth it. Not only am I delighted with the cabinet makeover but also I do believe I’m addicted to Mod Podge. Yep, this midlife woman is addicted. So far I’ve refaced my cheap, plastic office clock, and my old clip boards. Next up, my desk.
***I found a massive amount of Mod Podge tips here – and yes, Mod Podge really does rock!

